How to set up a website and database using the Turnkey Linux LAMP stack

If you need to host your own website for the purposes of web development, Turnkey Linux LAMP Stack is an easy to install all-in-one solution that you can set up on a spare computer or a VM (Virtual Machine).
I recently wanted to do this so I could locally test a website project I have been working on, and do PHP debugging. I had a spare old Celeron PC that I used for this purpose.
Step one is to download the ISO and install it on a computer or VM. I used Rufus to copy the ISO file to a USB drive but you don't need to do that if installing on a VM.
Installation of Turnkey Linux is simple and the questions that get asked during guided to install should be easy to answer. Once installed you can log in with root and the password you chose during installation and then set up your network with either DHCP or a static IP. I chose a static IP so that I could set up a local domain name I could use when accessing my website locally.
In Windows you can set up a local domain by editing the file C:WindowsSystem32driversetchosts. Note that you will need to run Notepad as an administrator to be able to save this file. Then just add a new line with the static IP address you chose and the domain name, for example:
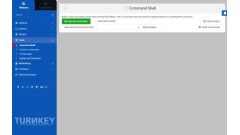
For many of the next steps you will need to log in to Webmin, a built-in website that allows you to administer the server. The default address is https://192.168.1.100:12321 (change the IP address to the correct address for your server). You will need to bypass a security warning as the website uses an untrusted self-signed certificate. The user name is 'root' and the password is the one you chose during installation.
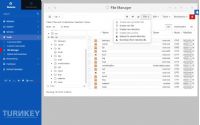
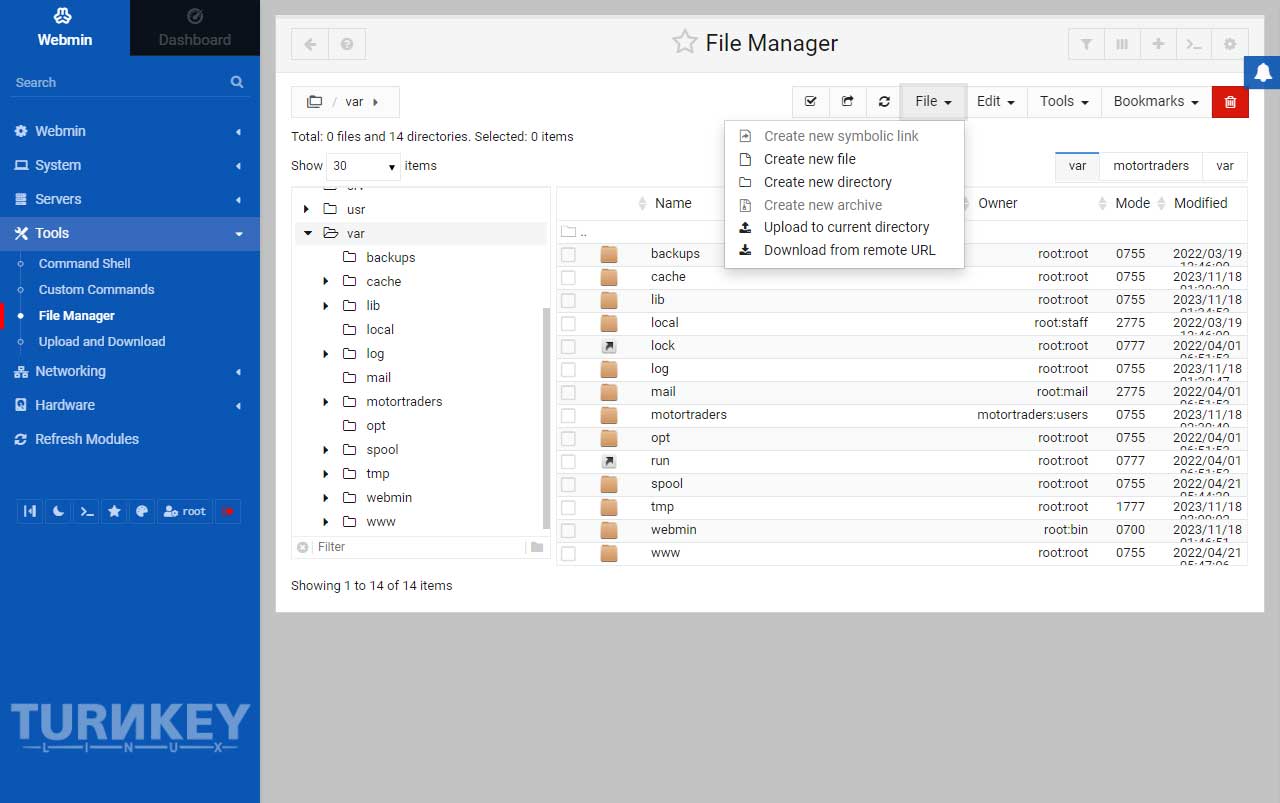
Next step is to create a folder for your website. Go to the Tools menu and then press File Manager.
The default websites are located in the var folder, and I would suggest your website(s) also be created there, so select Create new directory in the File menu near the top right corner of the page, and type in a name for your website, eg "mywebsite".
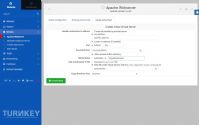
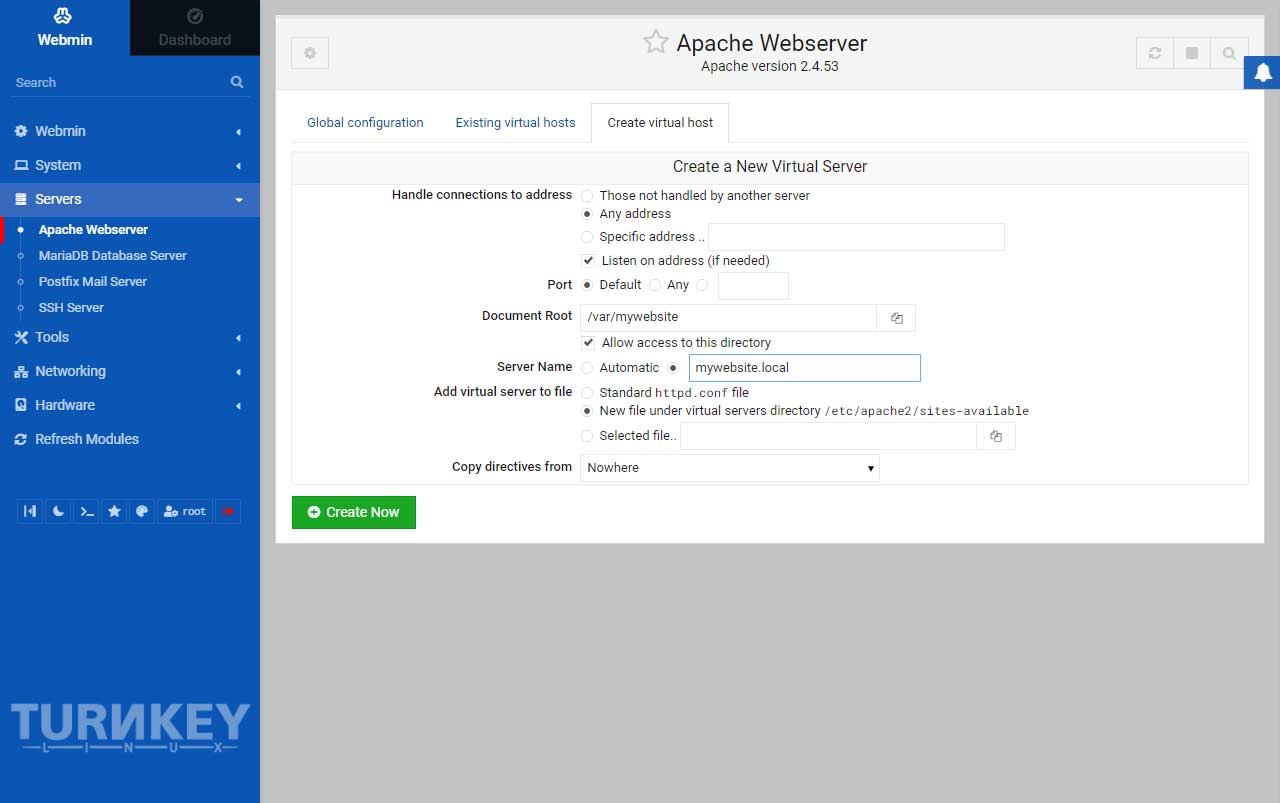
You can now go to the Servers menu and press Apache Webserver, then press Create virtual host. There are many options for setting up a website, but I entered 80 for Port, chose my newly created folder for Document Root, and entered my local domain for Server Name.
You can now navigate to your local domain in a web browser and you should get a "Forbidden" error message as you don't yet have any files or pages to serve.
Most websites have a database, and the LAMP stack includes MariaDB, a MySQL compatible database server.
We can now create a database and a database user.
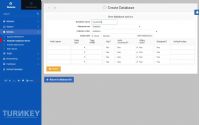
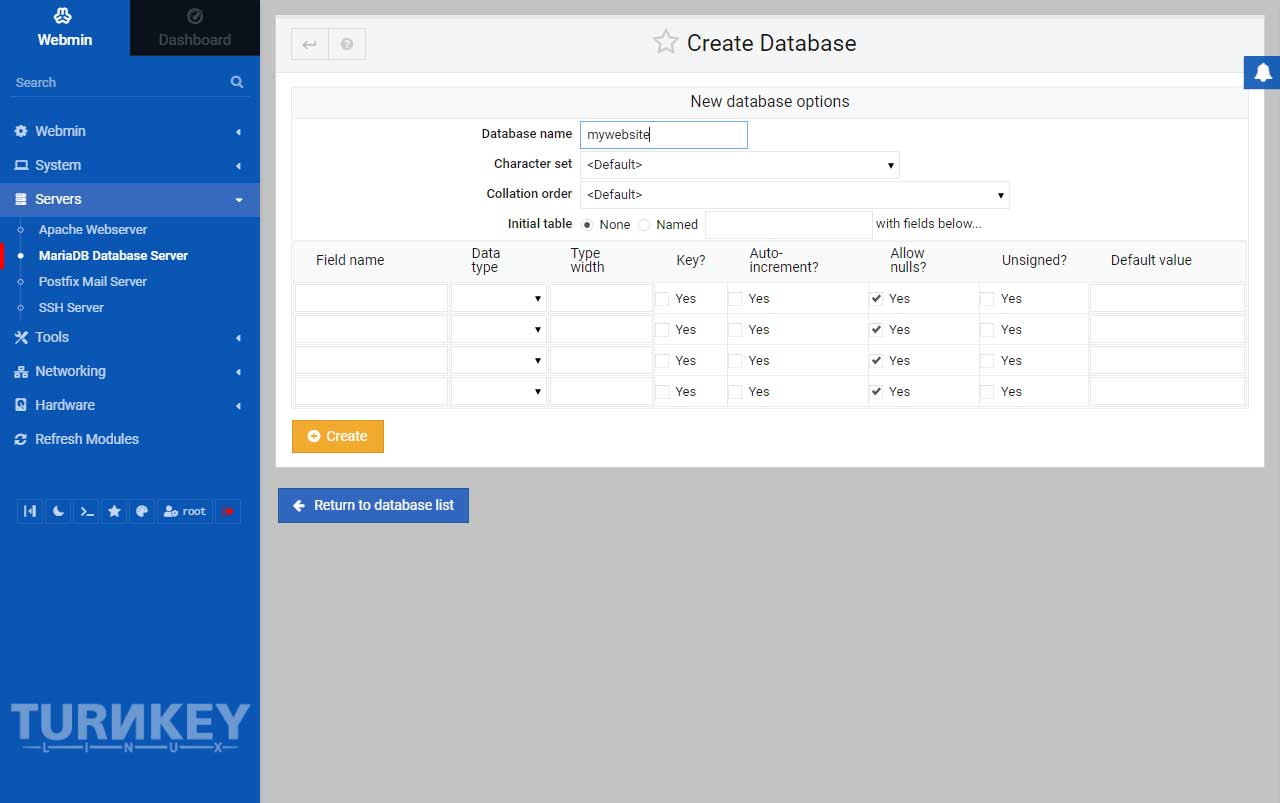
From the Servers menu, press MariaDB Database Server, and then press Create new database. On the form enter a name for your database and optionally choose any other settings you may need, or just leave the defaults.
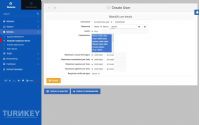
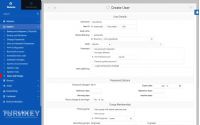
Once the database is created, press User Permissions and then Create new user. Enter a username and password and select Permissions that your user will need (I selected all of them).
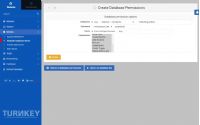
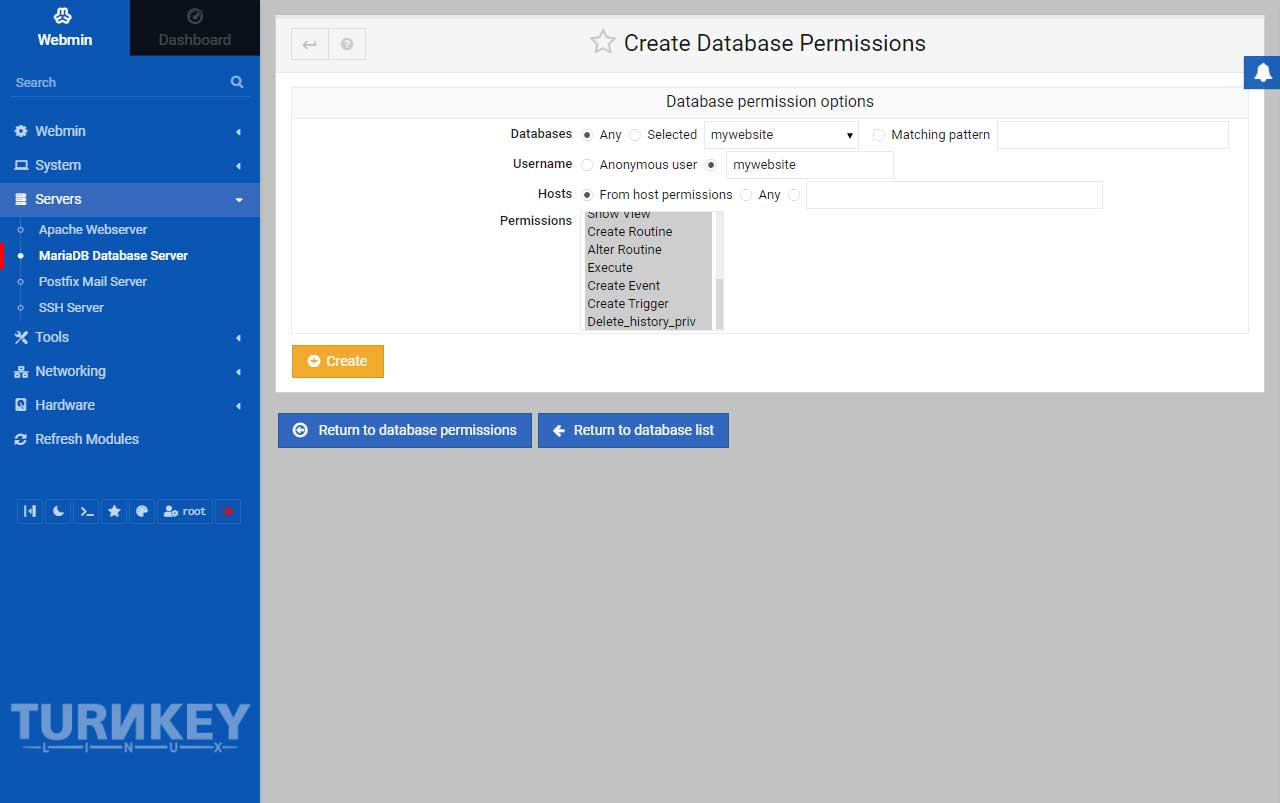
After the user is created you can give the user access to your database. Press Database Permissions and then Create new database permissions and then select your new database and enter your new user name and then create the permission.
You can check you have database access by going to https://192.168.1.100:12322 (change to your IP address) and logging in with your new database user. Once logged-in you can also import or create your database objects and data if you are ready.
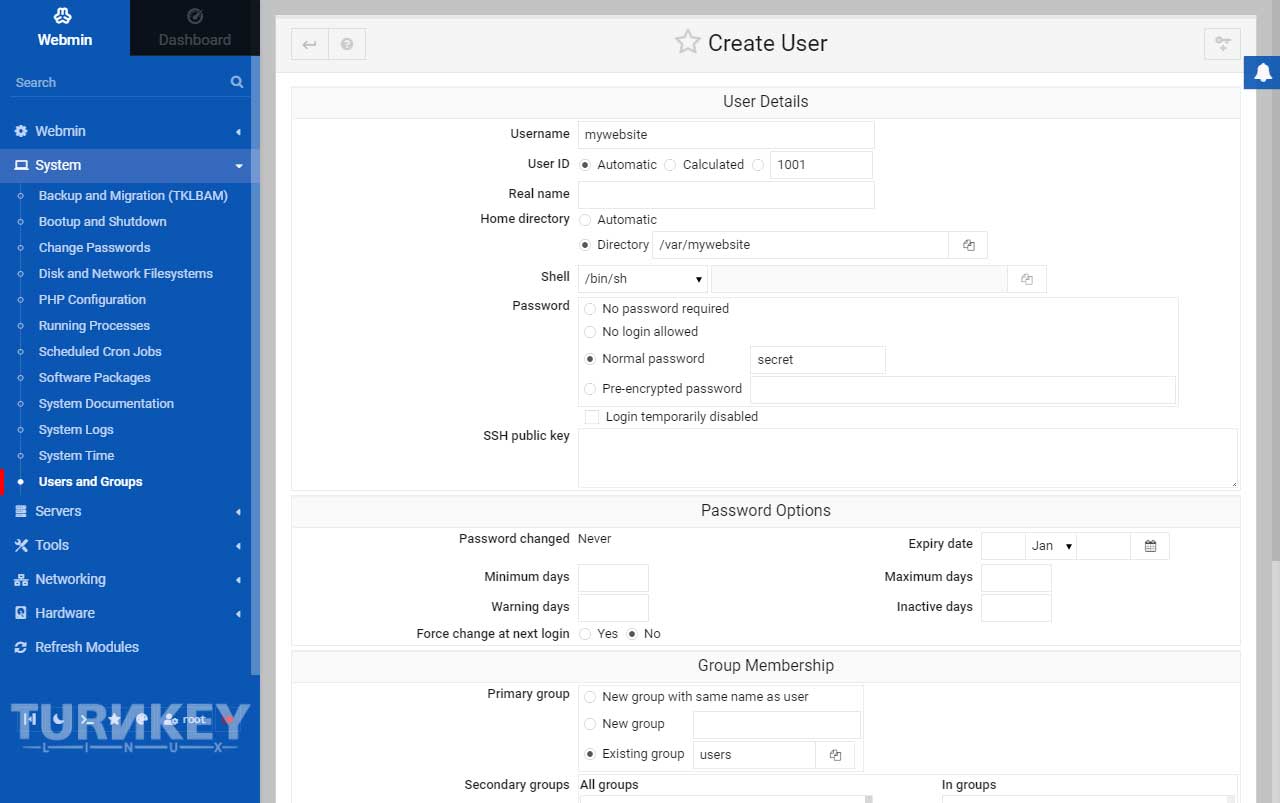
Although you can manage files using the built-in file manager, you will most likely want FTP access so you can deploy code changes from your web development IDE. For this you will need to go to the System menu and create a new user. Enter a username, select your website folder as the Home directory, and enter a new password as the Normal password.
Once your user is created you can connect using SFTP to your server's IP address or local domain and using the user name and password you just created. You will need to change ownership to the folder to your FTP user and also change permissions.
In a future post, I will document how to configure Xdebug and debug from Visual Studio and/or VS Code, and deployment via SFTP.
I recently wanted to do this so I could locally test a website project I have been working on, and do PHP debugging. I had a spare old Celeron PC that I used for this purpose.
Step one is to download the ISO and install it on a computer or VM. I used Rufus to copy the ISO file to a USB drive but you don't need to do that if installing on a VM.
Installation of Turnkey Linux is simple and the questions that get asked during guided to install should be easy to answer. Once installed you can log in with root and the password you chose during installation and then set up your network with either DHCP or a static IP. I chose a static IP so that I could set up a local domain name I could use when accessing my website locally.
In Windows you can set up a local domain by editing the file C:WindowsSystem32driversetchosts. Note that you will need to run Notepad as an administrator to be able to save this file. Then just add a new line with the static IP address you chose and the domain name, for example:
192.168.1.100 mywebsite.local
For many of the next steps you will need to log in to Webmin, a built-in website that allows you to administer the server. The default address is https://192.168.1.100:12321 (change the IP address to the correct address for your server). You will need to bypass a security warning as the website uses an untrusted self-signed certificate. The user name is 'root' and the password is the one you chose during installation.
Next step is to create a folder for your website. Go to the Tools menu and then press File Manager.
The default websites are located in the var folder, and I would suggest your website(s) also be created there, so select Create new directory in the File menu near the top right corner of the page, and type in a name for your website, eg "mywebsite".
You can now go to the Servers menu and press Apache Webserver, then press Create virtual host. There are many options for setting up a website, but I entered 80 for Port, chose my newly created folder for Document Root, and entered my local domain for Server Name.
You can now navigate to your local domain in a web browser and you should get a "Forbidden" error message as you don't yet have any files or pages to serve.
Most websites have a database, and the LAMP stack includes MariaDB, a MySQL compatible database server.
We can now create a database and a database user.
From the Servers menu, press MariaDB Database Server, and then press Create new database. On the form enter a name for your database and optionally choose any other settings you may need, or just leave the defaults.
Once the database is created, press User Permissions and then Create new user. Enter a username and password and select Permissions that your user will need (I selected all of them).

After the user is created you can give the user access to your database. Press Database Permissions and then Create new database permissions and then select your new database and enter your new user name and then create the permission.
You can check you have database access by going to https://192.168.1.100:12322 (change to your IP address) and logging in with your new database user. Once logged-in you can also import or create your database objects and data if you are ready.
Although you can manage files using the built-in file manager, you will most likely want FTP access so you can deploy code changes from your web development IDE. For this you will need to go to the System menu and create a new user. Enter a username, select your website folder as the Home directory, and enter a new password as the Normal password.
Once your user is created you can connect using SFTP to your server's IP address or local domain and using the user name and password you just created. You will need to change ownership to the folder to your FTP user and also change permissions.
In a future post, I will document how to configure Xdebug and debug from Visual Studio and/or VS Code, and deployment via SFTP.
Related Posts
Converting dBase IV programs to run in the browser
by johna | September 13, 2024
Some pointless entertainment trying to get some old dBase programs running in the browser.
How to enable URL rewriting using the Turnkey Linux LAMP stack
by johna | December 27, 2023
An extra part covering URL rewriting for my guide to setting up a website and database using the Turnkey Linux LAMP stack.
How to set up a debugging using the Turnkey Linux LAMP stack and VS Code
by johna | December 19, 2023
The second part in my guide to setting up a website and database using the Turnkey Linux LAMP stack.

Comments
There are no comments yet. Be the first to leave a comment!