How to disassemble Rinnai Avenger 25 gas heater (investigating error code 11)

Our Rinnai Avenger 25 is suffering from error code 11. This error indicates that the heater did not ignite correctly and possible causes are no gas supply or no ignition.
In the case of our heater, I can hear it sparking and then I can feel plenty of heat coming from it, but the sparking does not stop and eventually, it switches off and shows error 11.
Based on this, I suspected one of the flame sensors might be the problem and read that they sometimes need cleaning so that was the first thing I wanted to try.
But how do you disassemble these heaters?

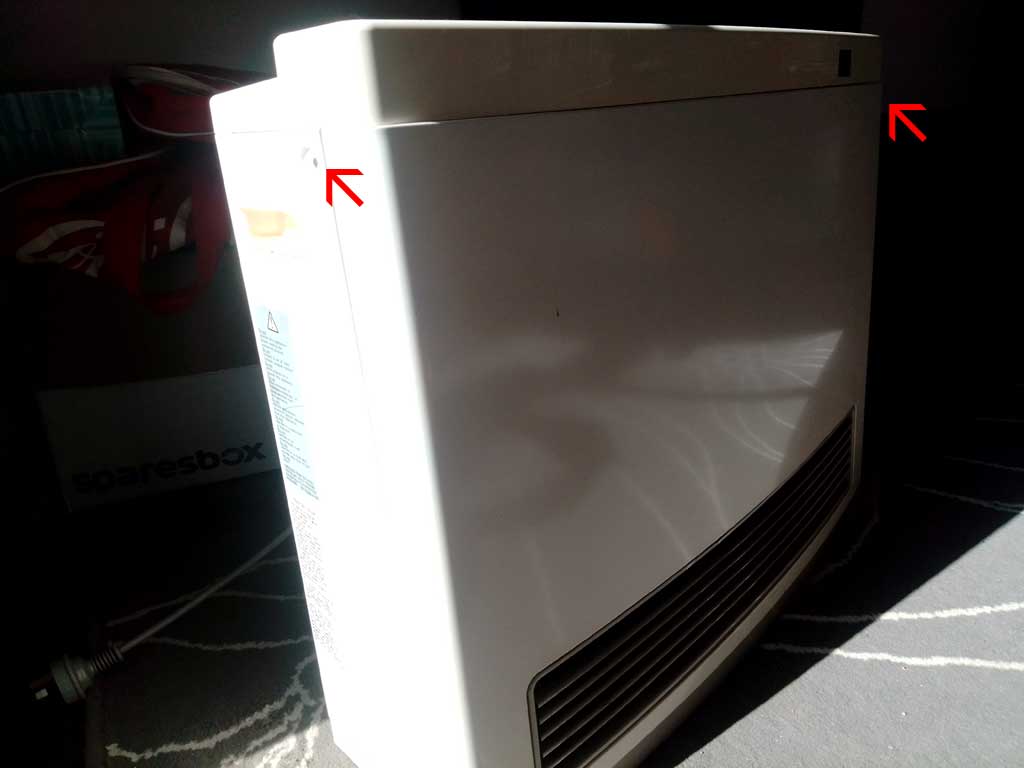
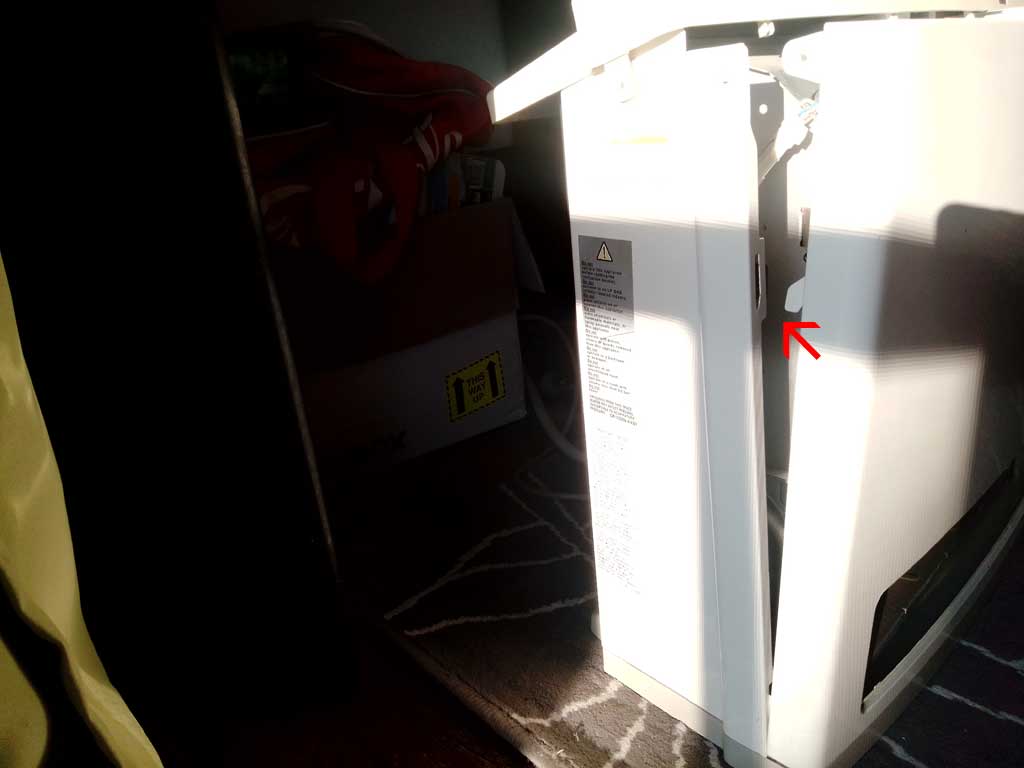
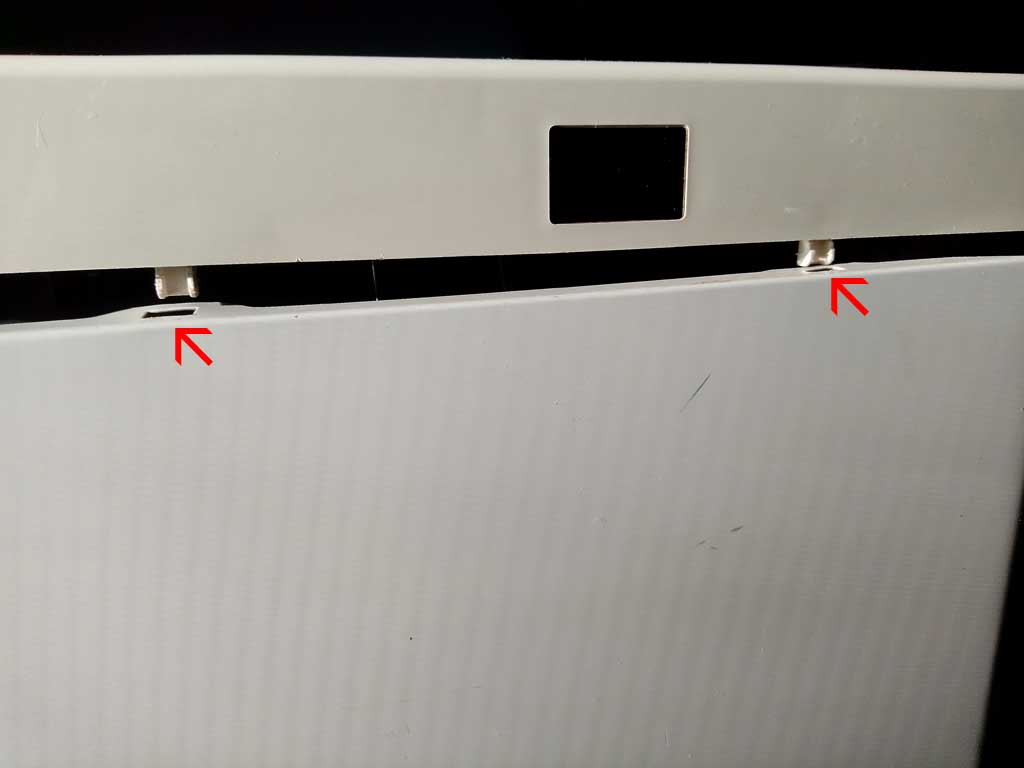
Then there are two Philips head screws on each side of the heater near the top, just in front of the handles. Once these are removed the front panel will tilt outwards a bit and then needs to be unclipped from the top panel which is a little awkward.
You may not need to remove the top panel but if you do then undo the three Philips head screws at the top, rear of the heater. It can then be pulled upwards, but it is held on by electrical connections. Even leaving it connected, you should have enough access for most work.

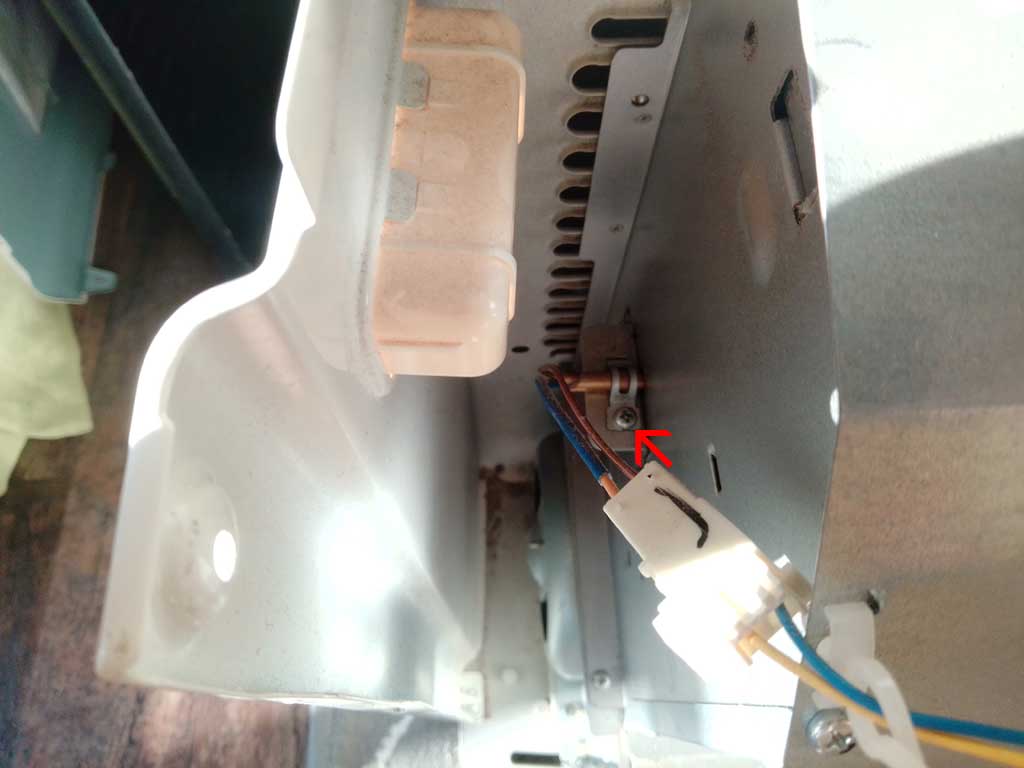
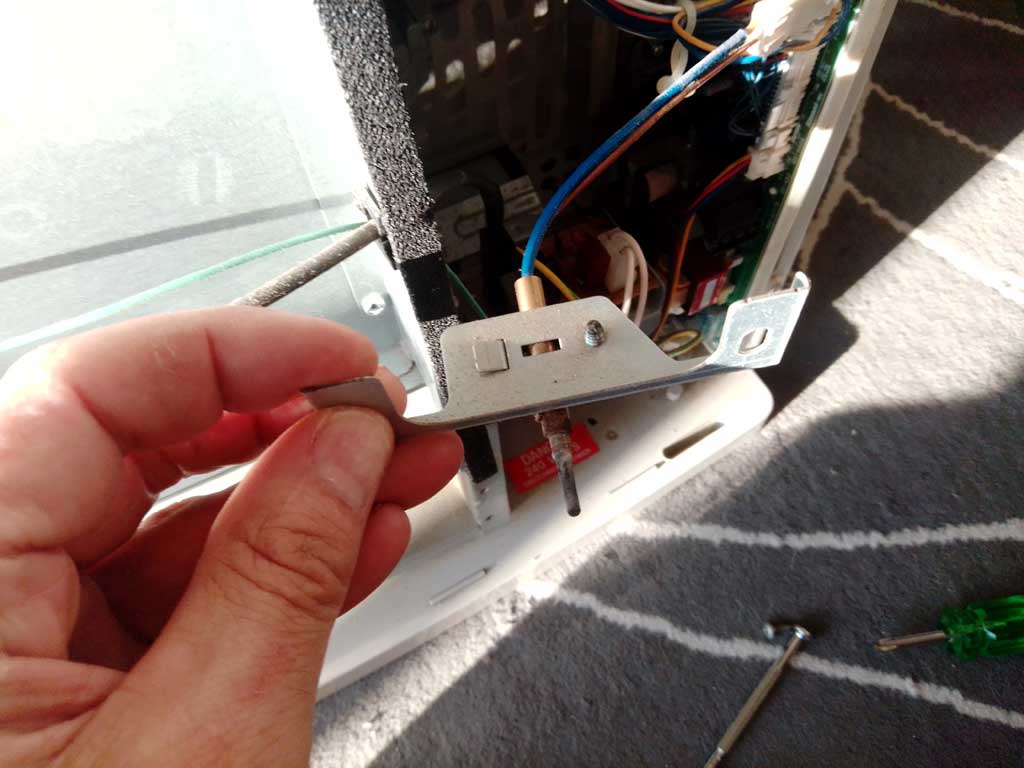
The flame sensors (described as thermocouples in the parts list) are located on each side of the metal part of the heater.
To remove the one on the left you can unscrew the single Philips head screw from above.
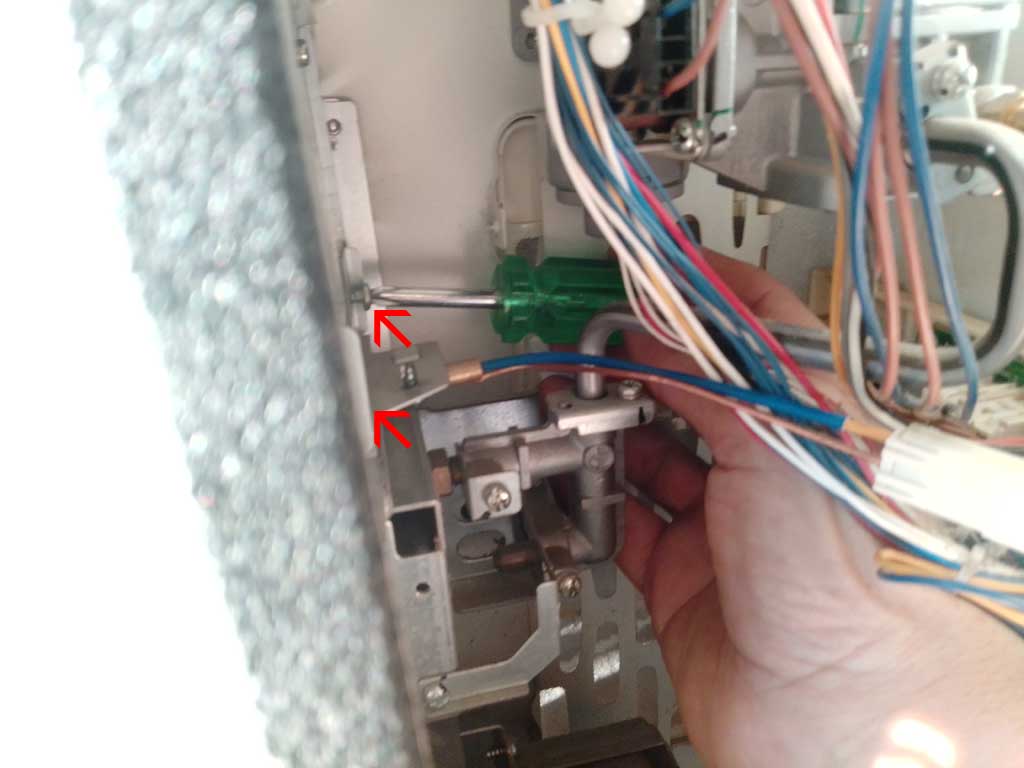
To remove the one on the right, I found it easiest to unscrew the two Philips head screws holding on the plate using a stubby screwdriver.
A little research suggested that the flame sensors can be cleaned with very fine sandpaper. I gave this a try and put it back together and tested the heater, but the problem was unchanged.
I'll post again with any further findings, but hopefully, at least this post is useful as a guide on how to disassemble these heaters.
I'm also including the parts list and diagrams PDF here.
Rinnai Avenger 25 (671TR) / Blaze (571TR) Beige/Platinum Silver parts catalogue
In the case of our heater, I can hear it sparking and then I can feel plenty of heat coming from it, but the sparking does not stop and eventually, it switches off and shows error 11.
Based on this, I suspected one of the flame sensors might be the problem and read that they sometimes need cleaning so that was the first thing I wanted to try.
But how do you disassemble these heaters?
Disassemble your heater at your own risk. Attempting to repair your own heater can be extremely dangerous and it may even be illegal to work on these yourself. I don't know what I'm doing so don't blame me if something goes wrong as a result of reading my instructions.
To take off the front panel you need to unscrew the two Phillips head screws at each side of the bottom of the grille part of the front panel. The grille then tilts upwards and can be pulled out.Then there are two Philips head screws on each side of the heater near the top, just in front of the handles. Once these are removed the front panel will tilt outwards a bit and then needs to be unclipped from the top panel which is a little awkward.
You may not need to remove the top panel but if you do then undo the three Philips head screws at the top, rear of the heater. It can then be pulled upwards, but it is held on by electrical connections. Even leaving it connected, you should have enough access for most work.
The flame sensors (described as thermocouples in the parts list) are located on each side of the metal part of the heater.
To remove the one on the left you can unscrew the single Philips head screw from above.
To remove the one on the right, I found it easiest to unscrew the two Philips head screws holding on the plate using a stubby screwdriver.
A little research suggested that the flame sensors can be cleaned with very fine sandpaper. I gave this a try and put it back together and tested the heater, but the problem was unchanged.
I'll post again with any further findings, but hopefully, at least this post is useful as a guide on how to disassemble these heaters.
I'm also including the parts list and diagrams PDF here.
Rinnai Avenger 25 (671TR) / Blaze (571TR) Beige/Platinum Silver parts catalogue
Related Posts
How to replace the door switch on Aldi Stirling STR-FL80 front-loader washing machine (error E4)
by johna | November 25, 2023
How I fixed error E4 on our Stirling STR-FL80 8kg front loader washing machine that we purchased from Aldi.
Electrolux/Simpson/Westinghouse clothes dryer struggles to start spinning
by johna | July 20, 2023
Possible solution if your clothes dryer is hard to get started.
Ozito LT4-1000 replacement line trimmer head
by johna | May 5, 2023
A cheap generic replacement line trimmer head to fit the Ozito LT4-1000.


Comments
There are no comments yet. Be the first to leave a comment!